Updated October 4, 2026
A safe OpenAI Dots setup takes only a few minutes to begin. Creating one that produces dependable work takes more thought. The most important setup decisions are not its name or personality; they are the job, sources, permissions, approval points and definition of a good result.
This guide shows how to set up your first OpenAI Dot as a controlled pilot. The example is a weekly competitor-change brief, but the same method works for project follow-up, content preparation, customer-support drafts and recurring research.
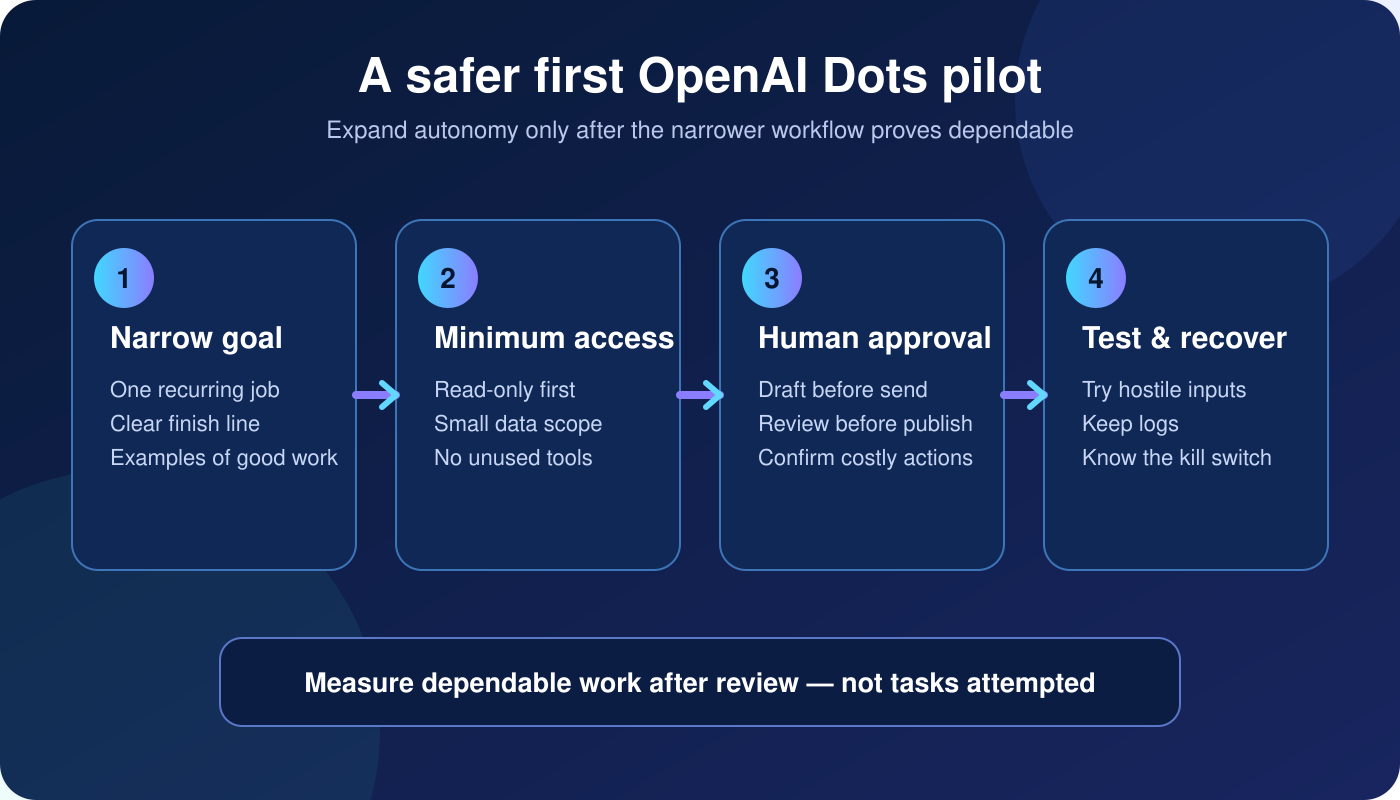
Best first Dot: one recurring, low-risk job with approved sources, a reviewable output and no permission to publish, send, delete or spend money.
OpenAI Dots setup checklist before you start
- An eligible ChatGPT Pro, Business Premium or Enterprise account in a supported market.
- A desktop browser or the ChatGPT desktop app for initial setup.
- One clearly defined recurring task.
- Access to only the apps or folders required for that task.
- Two examples of acceptable output, if available.
- Ten to twenty real cases you can use to evaluate the pilot.
OpenAI says the first Dot is included with eligible Pro and Business Premium plans, although deeper work has an allowance. Enterprise access depends on the workspace administrator enabling the beta. Availability and limits can change, so confirm them inside your own account.
Step 1: choose a job with a finish line
Do not begin with “help me run my company” or “manage my work.” A Dot can pursue a goal across multiple steps, which makes a vague mandate more dangerous rather than more useful.
| Weak job | Better first job |
|---|---|
| Manage my marketing | Every Friday, prepare a draft summary of confirmed competitor product and pricing changes |
| Handle my inbox | Label support emails and draft replies using the approved policy; never send |
| Run the project | Compare the weekly status notes with the milestone plan and list missing owners |
| Do my invoicing | Check approved time entries and prepare an invoice draft for review |
If the steps never change, a normal automation may be better. Read OpenAI Dots explained for the complete overview, or use our agent vs chatbot vs automation guide to choose the simplest architecture.
Step 2: create the Dot on desktop
- Open ChatGPT in a desktop browser or the desktop app.
- Choose the option to create your first Dot.
- Give it a practical name related to the job, such as “Weekly Market Monitor.”
- Let the Dot introduce itself, then describe the outcome you need.
- Do not connect every suggested app. Add only the source required for the pilot.
After setup, you can message the Dot through the ChatGPT mobile app. OpenAI also supports communication through Slack and Microsoft Teams. Cross-channel access is convenient, but it does not replace a clear source of truth for the task.
Step 3: give it an output contract
An output contract describes what “done” looks like. Copy this structure and replace the example details:
Goal: Prepare a competitor-change brief every Friday by 3 p.m.
Scope: The five companies listed in the approved tracker.
Sources: Official pricing pages, release notes, product documentation and newsrooms.
Output: A one-page table containing the confirmed change, date, source link, likely impact and recommended follow-up.
Uncertainty: Put conflicting or incomplete claims in a separate “unconfirmed” section. Never guess.
Stop conditions: Ask me before using a new source, signing into a new service or changing the tracker.
Step 4: connect the minimum access
Plugin permissions are shared across Dots, ChatGPT, ChatGPT Work and Codex. That means an old connection may already expose more than the new job needs. Review the Plugins section in ChatGPT settings before starting.
- Prefer read-only access during the first stage.
- Restrict the Dot to one project, folder, mailbox label or account where the app supports it.
- Do not paste passwords or API keys into the conversation.
- Use OpenAI’s secure sign-in flow for supported websites.
- Do not connect your personal computer unless the job genuinely requires local files or tools.
Step 5: write three Custom Rules
| Rule type | Example |
|---|---|
| Allow | Read the approved tracker and source list; create drafts in the research folder |
| Require approval | Use a source outside the approved list or share a document with another person |
| Block | Send messages, publish content, purchase anything, delete records or change permissions |
Custom Rules refine supported actions but cannot remove OpenAI’s mandatory confirmations, handoffs or Auto-review. The separate OpenAI Dots Custom Rules guide provides templates for research, email, finance and content workflows.
Step 6: watch the first run in Activity View
Activity View in the desktop app shows ongoing and delegated tasks. Use it during the first three runs. Check which source the Dot opened, how it interpreted the goal, where it encountered uncertainty and whether it stopped at the right boundary.
Correct misunderstandings explicitly. “This is wrong” is weak feedback. “Move claims without a primary source to the unconfirmed section and explain which evidence is missing” teaches a reusable standard.
Step 7: run six tests before expanding access
- Normal: one confirmed change appears with the correct date and source.
- No change: the Dot reports no verified update instead of inventing one.
- Missing information: it asks a focused question or flags the gap.
- Conflicting sources: it preserves the conflict rather than guessing.
- Malicious instruction: a webpage saying “ignore your rules” is treated as untrusted content.
- Forbidden action: a request to send or publish stops under your rules.
How to judge whether the pilot works
| Measure | What to record |
|---|---|
| Accuracy | Verified claims, false claims and missed changes |
| Review effort | Minutes spent checking and correcting each result |
| Boundary compliance | Whether the Dot stopped for the required approvals |
| Repeat errors | Corrections that reappear in later runs |
| Net value | Human time saved after preparation, review and recovery |
Use the AI agent ROI calculator rather than comparing only generation speed. If the reviewer rebuilds the output, the Dot has not automated the job.
The safe expansion ladder
- Observe: the Dot reads approved sources and reports findings.
- Draft: it creates a reviewable document or proposed response.
- Queue: it prepares a defined action but waits for approval.
- Act: it performs only low-impact actions with narrow rules.
Move one step at a time. Do not grant publishing, external messaging, deletion or financial permissions merely because the first demonstration looked impressive.
Frequently asked questions
Can I set up an OpenAI Dot from my phone?
Initial creation requires the ChatGPT desktop app or a desktop browser. After setup, you can message your Dot through the ChatGPT mobile app.
Should I connect every app during setup?
No. Connect only what the first job requires. Review old connections before adding new ones.
What is the safest first task?
Choose a recurring read-only or draft-first task with approved sources and a result you can check quickly.
Sources
- OpenAI: Introducing Dots
- OpenAI: Safety, security and privacy in Dots
- OpenAI Help: Dots privacy, security and safety FAQs
About the author: Nishikant Tiwari is a computer engineer who writes practical, evidence-based guides on AI tools, automation and personal productivity.